Showing posts with label Editorial. Show all posts

Monday, November 2, 2020

Jain Zar and Drazhar

 It’s taken a while to get my finances back in order to do some real hobby investment, but now I’m ready to start building up a set of “studio” armies and really expand the channel.

I’d like to introduce the new style Drazhar and Jain Zar!

With them now ready to duel, I’ve been hard at work building the background for the slowly growing Drukhari force and in a change for me, instead of leaning into the Grim Dark I’m going with a more comical bent.

I’m excited to try out Drazhar, even if he is facing off against a character in my previous Ulthwe force.

Wednesday, September 2, 2020

First 9th Edition Battle (Written)

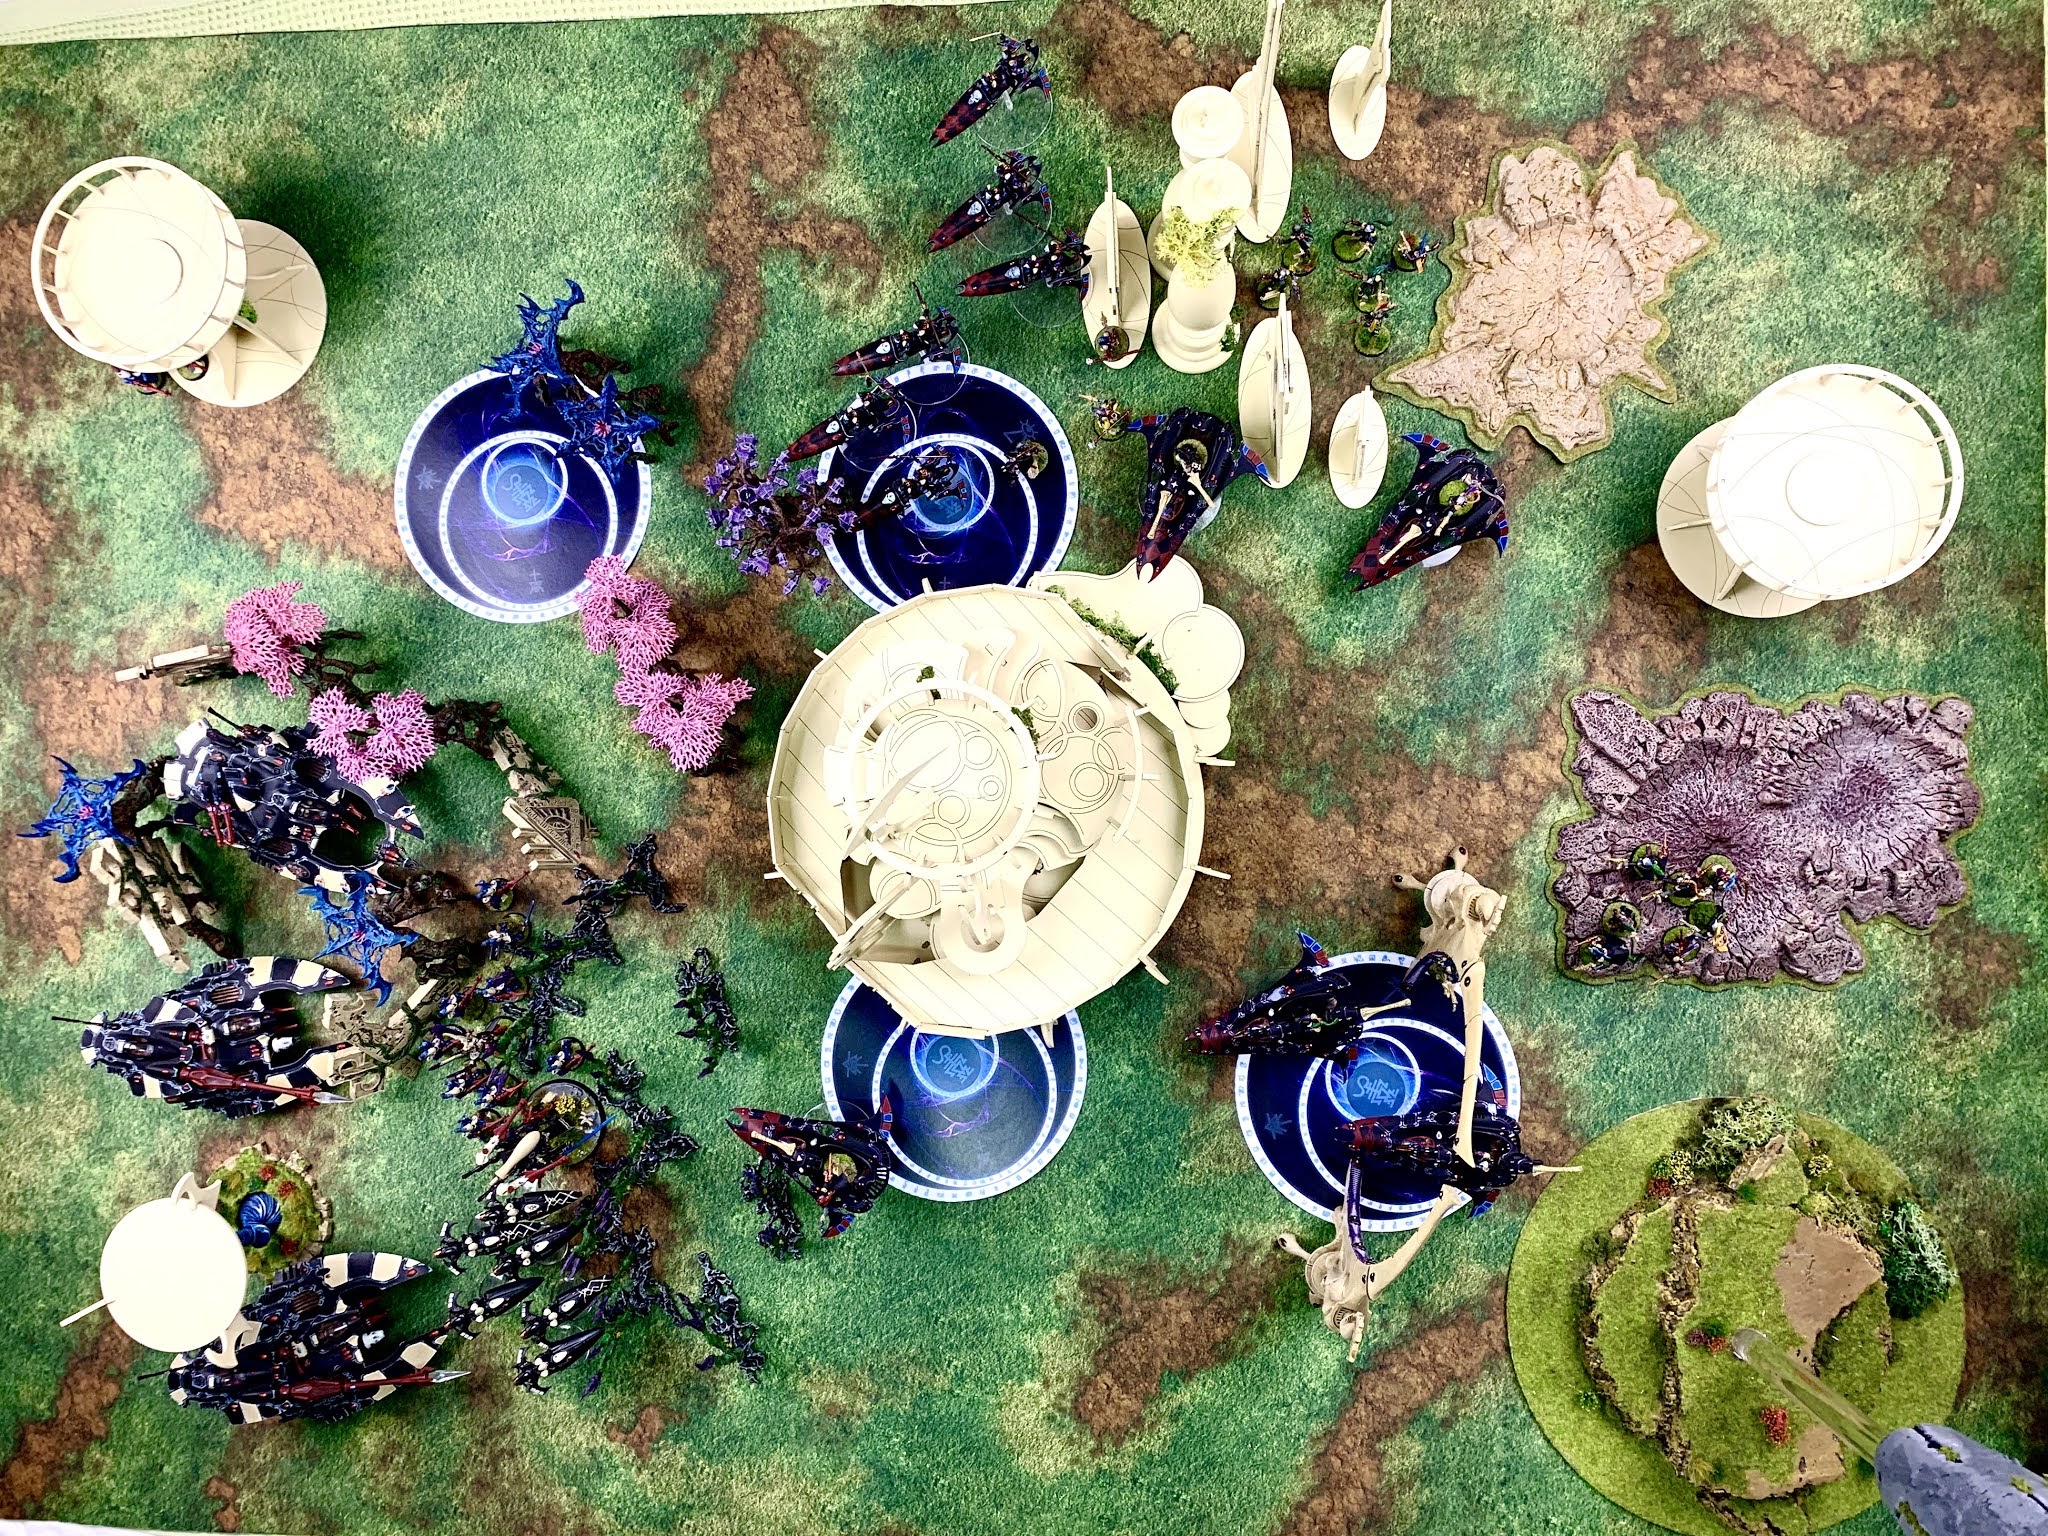
 I had my first 9th edition game recently when a friend came by.  To keep things as COVID19 friendly as possible it was all my models.  I made both army lists and let my opponent choose which to play.  My gut instinct was that the Craftworld list was really hard hitting and probably stronger than the Harlequin list, but my opponent had never tried Harlequins before and wanted to give them a shot.  The table had a lot of -1 to hit coverage, and as that was mostly redundant for Harlequins he opted for the other side of the board.  While it's hard to see the Craftworlders have a unit of Dire Avengers hidding behind the corner tower, and a unit of guardians and warp spiders waiting to deep strike.  The Harlequins had an 11 trouper unit also in the web.  Deployement:


The Harlequins won the first turn, and with the mission rewarding holding objectives they pushed forward really quickly to take as much ground as possible and the further back unit being given a bonus to their invul thanks to Prismatic Blur.


With units in place the psychic phase wasn't really momentous.  Webway Dance failed, but one troupe was gifted a -1 to hit.  Meanwhile the Shadowseer cast Twilight Pathways letting a Starweaver slingshot to a third objective and really put the screws to the forces of Ulthwe.


The two units of Skyweavers opened up with their Haywire cannons on the Wave Serpent, and despite a -1 to hit.  Each unit got 13 shots and after they were done the Wave Serpent was diminished to a single wound.  Unfortunately they were not the collective firepower of the Harlequins.  The Skyweavers shuriken cannons took it down, killing one of the warlocks inside.  Meanwhile the Prismatic Cannons of the Void Weavers crippled the Wraithlord taking it down to one wound.  The Dire Avengers under the tower were reduced to a single model by the combination of Cegorach's Lament and Harvester of Torment.  Despite the -1 to hit 9 shots tore through the unit in a savage display.  The bikes were thinned out with the Neural Disruptors and the Humbling Cruelty Jester.  By the time their combined work was done 5 bikes had been wiped away and the unit had a lone survivor.  Without any assaults the morale phase wiped out the last of the Dire Avenger squad that had been savaged.


After suffering a devastating opening round of fire Ulthwe sought to take over the closest two objectives and hope to hold out long enough to last until their reinforcements arrived.  Most of the positioning was in preparation to take things over in the next turn.


The Combined psyshics of the Warlock Conclave and Eldrad wiped out a unit of skyweavers and dropped the save on the Blurred unit of bikes back to a 4+ while bumping their own save to 3+.


The shooting phase was a bit of a bad turn for the Craftworlds which put a couple wounds on a Starweaver and the combined shooting of the Fire Prisms only managed to kill a single of the doomed bikes.


The phase I was most prepared to do some damage was assault.  It got off to a good start when the Wraithlord got a 9" charge at almost point blank range  However, the Autarch only managed a 2" charge, though he was fine with that.  The real issue was when the Dire Avengers rolled a 3 on their charge, followed by a reroll to a 3.  This meant they didn't get the distance they needed, even with their consolidation, to fully wrap the Starweaver.  When it was eventually brought down the Harlequins and Troupe Master all bailed out with only a single trouper trapped in the wreckage.


The Harlequins got their reinforcements and moved for the cous de grace, surrounding the Warlocks and Eldrad, and preparing for the assault phase.


The psychic phase was a total bust with Eldrad and the Warlocks stopping every spell, noteable for the moment a Shadowseer cast Twilight Pathways on a 10, and Eldrad clutched it with a 12 to deny.


The shooting phase was much more suitable for the Harlequins, with the Harvester of Torment mercilessly wiping out a second unit of Dire Avengers, the bikes spiking a 12 in their random number of shots at a Prism and Void Weaver support assisting in taking the tank down.  Meanwhile the Skyweaver full of Fusion guns finished off the heavily wounded Wraithlord.  As the combined fire of three units of Harlequins took down a few more Warlocks the Troupe Master caught the Autarch with a Fusion gun, likely being saved by his force shield.


The Troupe Master charged into the Autarch while 2 units of Harlequin troupes and the last bikes all charged the Warlocks... and the Solitaire charged Eldrad directly.  The large units that just ported in failed their charge, even with a reroll.


To start the phase the the Troupe Master dispatched the Autarch with complete efficiency using the Twilight Fang.  Then the Warlocks interrupted combat with Supreme Disdain taking down a handful of Harlequins before they could unleash death.  Unfortunately for the Warlocks they didn't take down enough of the nimble warriors.

The warlocks, even with using Lightning Fast Reflexes were cut down by the Harlequins, wiped out to a man, probably after they froze in shock when Eldrad was cut down by the Solitaire using Cegorach's Rose.


At this point, looking at a likely 80 pt deficit by turn 5, with only two very vulnerable models on the table, even the deep strikers would not swing the game beyond the total route it had devolved into.

One thing I learned in this game was that I need to review my terrain to have more central line of sight blocking terrain towards the centre of the board.  But I also learned that Craftworlds are in a really really bad place at the start of 9th edition.  They have arguably the worst troop options in the game compared to points, and suffer greatly in the need for durability.

Another lesson learned was that while choosing good secondaries for a force is helpful, but something you still actively need to account for, choosing the wrong secondaries pretty much wipes 45 points from your game to start.  I need to reimagine what constitutes an "all comers" Craftworlds list, and what secondaries I can realistically pursue since many of them require sacrificing units for any purpose other than performing actions, and when your units get cut down quickly you can't often actively sacrifice performance for a turn.


Monday, October 21, 2019

Old Banshees Newly Painted

A couple months ago I finally got around to working on some new (2006) banshees for my Ulthwe warhost to update my squad.


With a bit of green stuff I strengthened the base and gave the models some height. I also made sure that the arm placement kept every mode in the unit looking looking slightly different. At the time I started the project I thought it could get my motivation charged up so I could complete the new Spiritseer behind them.

I started to paint them and in a couple days made some pretty good progress (for me).


Then it happened. Before the unit was fully done GW announced new plastic Banshees and a new Jain Zar. My motivation was gone, for weeks. But then, GW announced they would only be in a boxed set I can’t really afford right now. So with months to wait until they are released and the book out now I got off my ass and put on the finishing touches.


And now they are prepared for war, and inspired a tweak to the way I paint power weapons to give them some punch. I’ll do a seperate article about which Exarch powers I’ll use for which units and why.

Tuesday, February 26, 2019

Ulthwe Vs Harlequins 2500pts Written Battle Report

Letting someone else use one of your armies is always an odd prospect, in part because you build an army for your own play style, and that leaves a gap between what you have available and what they'd want.  That said, I've got my Midnight Sorrow Harlequins vs my Ulthwe.


The Ulthwe list above has a take-all-comer vibe, designed to be flexible enough to face more elite forces like Castellan and friends, or hold up against more of a horde force.  As a Brigade it boasts an impressive 15 command points.


The Harlequins are a force that is limited by my collection.  In this case in order to squeeze as many points as I could from the list I split my Harlequin squads from 12 down to 6 troupers each.  This allowed me to build two Battalions and add on a Vanguard detachment to total out 14 command points.  this also required me to take the Webway Portal in order to hit the 2500.  As it's basically playing with a handicap I took charge of the Harlequins.

The mission was #2 of the new Maelstrom missions, something like Head of the Snake.  Essentially you comfortably generate new tactical objectives each turn, but when a character dies you lose an outstanding objective.

Deployment: We opted to have the objective markers overturned until after deployment, meaning we had no idea what objective was where.  This made it tougher to remove objectives to refine the deck so I couldn't use my ordinary trick of removing the "defend objective" cards that are from my opponent's half of the board.


Harlequins would go first unless Ulthwe could seize.  Both forces lined up, but Ulthwe was clearly prepared to absorb a charge and hold off its foes long enough to gather against the clowns, even having Fire Dragons in a Falcon preparing to take down the Webway Gate before the 6 Harlequins deployed in the labyrinthine depths of the webway along with a Death Jester.  Unfortunately for the craftworld they did not seize, allowing the Harlequins to go first. 

Player 1 Battle Round 1:


The Harlequins moved up aggressively, and thanks to the Shadowseer slingshotting a troupe up the field with a second move they managed to get into the front lines.  The two units of Haywire bikes were okay against the Falcon and a Warp Hunter, but didn't destroy either, instead knocking them to their mid level profiles.  The troupe that got into the thick of it finished off a Guardian squad and attempted to wrap up the farseer but couldn't get in behind him with the changes to the Flip Belts rule.  In all the Harlequins got First Strike and achieved another objective whilst starting to defend an objective as well.

Player 2 Battle Round 1:


Looking to stem the tide the forces of Ulthwe quickly shifted position.  The bikes leapt out to cut down the Troupe Master who I had foolishly left unaccompanied by a troupe (since they were in the Ulthwe lines).  The fire dragons sped from the Falcon to take down the webway gate, but most of the units just shuffled around.  The Wraithknight trundled forward to try and dominate the center of the board.  A solid move as Harlequins often have trouble facing off against knights of any kind.  In an unexpected turn Ulthwe was entirely shut down for the psychic phase.  The Farseer had been placed in hopes of eliminating the troupe that was in the frontlines with Executioner and the bikes with smite, but both powers got denied, as did Jinx.  In fact Jinx and Executioner were denied with box cars.  The neutering of the psychic phase made a huge dent in the potential for the craftworld forces.  They did eventually manage to kill the troupe and the closest unit of bikes, after putting unholy amounts of firepower into them, but it meant that little could be done to damage the units that were quickly approaching.  When the Firedragons fired, point blank, at the Webway gate the unit of 6 managed to do a total of 5 wounds.  Considering I failed the one save I'd been required to make on it I just saw this as a reminder that Fire Dragons are overpriced given their unreliability combined with their frailty.  They aren't like Wraithguard, who can survive a bad round of fire, and take considerable effort to eliminate.  The bikes laid a tremendous amount of firepower into the Troupe Master, but with his 3++ he shrugged off all but 3 wounds.  The bikes charged him, hoping to finish off the last two wounds and net Warlord, but failed, and lost two of their number, one to the Heroicly Intervening shadowseer.  Ulthwe was positioned to defend two objectives in the next turn, and had secured first strike, but hadn't had immediately achievable goals, discarding a Defend Objective that was on the Harlequin side of the board.

Player 1 Battle Round 2:


This was a huge turn for the Harlequins.  They disembarked all units in transports in a pincer move, while the jetbikes pushed forward up the center.  For psychic powers a Shadowseer fogged the mind of the Wraithknight while another challenged it to a battle of minds and put two wounds on it.  Another managed to place -1 to hit on a unit coming up the center of the board.  Having success in the Psychic phase gave me a lot of confidence.  This was followed up by the second unit of bikes using haywire to finish off the wounded Warp Hunter.  I was, perhaps, even a bit cocky with 6 fusion pistols at point blank range with the wraithknight.  Unfortunately 4 of the troupers were unfamiliar with the sidearm and completely missed the hulking monstrosity.  The other two hit, but only one wounded and managed 4 damage.  Ultimately an uninspiring fare.  The Assault phase was fierce with the Solitaire getting in to the Spiritseer, the Troupe Master getting in to the Shadow Spectres as he could not be overwatched, and the bikes making it in to Dire Avengers while 3 troupes and a troupe master all made it in to assault with the wraithknight.  A troupe fully armed with Harlequin Kisses managed to bring the Wraithknight down to 4 wounds.  This made interrupting less appealing, but my opponent did in order to try get slay the warlord.  His assault failed and the Harlequins proceeded to slaughter Dire Avengers, Guardians, Shadow Spectres, and the Solitaire slaughtered the Spiritseer.  After it consolidating leaving it about 4" from the Autarch and Bonesinger... after the minor attempt of Utlhwe to strike back it was the end of the fight phase and I played the Fight Again strategy on the Solitaire... followed by the Troupe Master finally spiking a refund for the first time ever, getting a three CP stratagem for free.  The Solitaire was a blur, slamming into the Autarch and Bonesinger.  While the Bonesinger died to the brutality of Cegorach's Rose, the Autarch's force shield was impressively effective, only letting one strike through.  While the Harlequins pushed ahead to 7 Victory Points the forces of Ulthwe were shattered to be forced to discard their Defend Objective cards when their characters were slaughtered, crippling their ability to score.

Player 2 Battle Round 2:


The Wraithknight left combat and was healed for 3 wounds.  Then the psychic phase began and the Farseer was ready to Smite and Execute his way to vengeance.  But again both his spells were denied, both with box cars!  At this point it was readily apparent that Ulthwe's Warhost was crippled.  All that was left was to see how many models could survive.  The Autarch obliterated the Solitaire with his fusion pistol while the Warp Hunter wiped out the second squad of bikes.  The fog stopped the Wraithknight from making much of an impact.  They still had not managed to score any Plobjectives.

Player 1 Battle Round 3:


The Autarch was killed netting warlord and the Wraithknight was wrapped up again, but even with a troupe master they only dropped it to 2 wounds.  By the end of the turn the Harlequins were set to defend an objective and were now comfortably leading 9-1.

Player 2 Battle Round 3:


The Farseer went nuclear, getting off Executioner, Mind War, and then a full size Smite, killing off a troupe squad, a Star Weaver, and the Troupe Master, thanks to the objectives he was set to achieve maxed out two D3 objectives, pulling in 7 Victory Points.  Outside of that MVP performance the Ulthwe forces managed to do little other than kill a Void Weaver and the Wraithknight did pretty much nothing useful while fogged.  The loss of the Troupe Master meant I lost the ability to score the Defend Objective I'd been working on.

Player 1 Battle Round 4:


Virtually all of the troupes had been destroyed, leaving just a handful of harlequins, but they were still moving to capture objectives, bumping up from 9 to 15 points.

Player 2 Battle Round 4:


Only 2 wounds were left on the Wraithknight.  It couldn't defend its objective with the expected movement of the Harlequin model, so it would need to live through the next turn and then hope the game continued and then live through the next turn to defend the objective.

Players 1-2 Battle Round 5: 


The Harlequins got big game hunter against the Wraithknight and Mercifully the game ended.  The only Ulthwe unit is the wounded Hornet.

Harlequin Victory 22-8.

This game confirmed the difficulties that Harlequins have with knights.  Even a single knight can cause problems for them, and this is without the ability to shift it to a 3++ against shooting.  a full knight force is basically a hard counter to them, because the bikes are so easy to take out for knights.

I feel like the Harlequin dominance of the psychic phases in turns 1 and 2 swung the game hard in favour of the clowns.  It required so much extra firepower to rout them from the Ulthwe force's front lines.

In this particular mission the Defend Objectives are such a liability because they can't be scored instantly, thus making them more likely to be unachievable because you lost a character.  All in all it was a fun game, but really cemented my thoughts about certain weaknesses in both armies and just how impressive certain units can be in the right circumstances (looking at you Solitaire).

DWH

Tuesday, February 19, 2019

How Often Do You Revamp Your Army?

With the crash of Corsairs from Forgeworld I'm thinking they'll be shifted to Kill Team at some future point.  Thus I'm slowly adapting mt old units that will never again see the table to play other roles.  This means I can find new ways to expand out existing units, such as below:


The two flamers were part of the original squad, and when the unit had templates they were an ideal way to make the unit a surprise impact squad that could spring out of a transport and lay waste to a massive infantry squad.  In 8th I haven't been able to fire the flamers a single time either on the charge or when being charged.  With the reduction in cost of the Fusion guns reduced along with the overall cost of the Storm Guardians it seems like a more tempting choice.

Fire Dragons still feel vastly too expensive, but this gives me an option to deep strike a massive unit and stretch it out enough so that the bulk of the unit can do something helpful like hold an objective, while these two models are stretched out to be close enough to add some potent firepower to a vulnerable target without wasting a ton of points.  With the 1-2 punch of Discipline of the Black Guardians and Celestial Shield they can provide an unexpectedly devastating hit, and then be surprisingly tough to shift.  If you somehow drop Protect on them at the same time a unit that is positioned well can become a nightmare to deal with, and one that your opponent never conceived could give them issues when overlooking your army at the start of the game.

All that said, I can switch out as I see fit, and I accomplished this by revamping an old unit to something I can make the most of now, the same way I scrapped two old bodyguard conversions to become Swooping Hawks again.  In some ways it just feels incredibly exciting to find new uses out of classic models I hadn't been able to run in what feels like forever.  It's bringing the fun back.

Wednesday, September 26, 2018

40k Narrative Campaign Pack for Download: Verdict of Mirandus (4 Players)

Recently BOLS released an article on narrative campaigns, and I found it quite engaging as it discussed an area of 40k that I'm very interested in, but one that I feel GW has been a bit slack in supporting.

As such, I spent quite a bit of time developing a campaign for some local players.  This pack is the result of the campaign, providing a set of generic rules able to be used for any four forces, along with the narrative story of the campaign, and the actual game results from each Chapter.

Note that that my approach to this story was to reveal the actual story like a serial, with each new chapter being shared only after the completion of the prior chapter, and then the epilogue and conclusion were released after the campaign play had completed.  This should provide a building block for any group of armies, allowing the person running the campaign to spend more time developing the story and making tweaks to fit their own needs. 

In the case of our play it was Ulthwe, Deathguard, Necrons, and Astra Militarum.

Download it below!


Download: Verdict of Mirandus Campaign Pack

Tuesday, July 3, 2018

Harlequin thoughts, and the Unplayable Webway Gate


With the release of the new Harlequins codex I picked up the stunning new Webway gate. With a few extra models painted and the gate I completed my Harlequin force and added them up to a surprising 2500 pts exactly! It's a massive allied force to my Ulthwe warhost.

I've gotten in a few games with them, tabling an Imperial Soup army consisting of Greyknights and Gulliman. I tabled them in turn 4. An opponent using 1ksons conceded halfway through his shooting phase on turn 1 as I played the 2 CP Stratagem to get them -1 to hit, on top of the psychic power.


For people excited to try out the "Great Harlequin"Stratagem... I've found it overpriced for its effect. I expect in future games I'll skip it and make use of the CPs in game. If it had a more profound effect, or only cost a single CP I'd reconsider and use it again.

Sky Weavers with Haywire Cannons are surprisingly versatile and I highly recommend them.  Neuro Disruptors are still disappointing and should wound on a 2+ against infantry.

One of the things I did in these games is test out the Webway Gate. It's a beautiful model, but it's rules are a hot mess. These are the problems and solutions as I see them -

Issues:

1) Asuryani and Drukhari do not ave access to gate stratagems.

Give them access to generic versions.


2) deployment for gate is too restrictive.

Reduce distance from other terrain features to 1" rather than 3" and reduce the 12" distance from enemy deployment to 3", as it becomes all but impossible to actually place on most boards.

3) deployed units are stranded with no protection and are unlikely to contribute.

Allow units to move after deploying as if they disembarked from a transport.


4) gate has no use beyond first or second turn as it provides no cover.

Make gate offer aura of protection, +1 to save, for units wholly within 3"


5) it's too easy to cheaply prevent large models like Wraithknight from entering play with a single cheap model.

Instead of deploying "wholly within" 3" change the rule so that all deployed models must be within 3", this forcing an opponent to have a tough choice about how they're willing to stop you deploying.


No single one of these changes is really sufficient to make the gate attractive. It really needs all 5 to make it viable for play.

Tuesday, February 20, 2018

Aeldari Community Rules Update

After the changes in Chapter Approved, it put the Phantom in a more awkward spot.  It felt out of place at 2400 pts and still it can be easily obliterated by a Warhound.  In workshopping and tweaking one thing became readily apparent... the MACRO rule has to change.  For this purpose we've workshopped it to "Macro weapons are heavy weapons that may not fire overwatch.  In addition successful invulnerable saves must be rerolled against Macro Weapons."  This is for all weapons with the MACRO rule and the rule now scales appropriately rather than being absurdly good against Titanic units and useless against non-titanic weapons.

From there it became a matter of fine tuning units, which mostly only took minor changes and point adjustments to keep them in line with other titanic units.  The Phantom, however, still needed a lot of playtesting.   Even after the considerable number of changes I made the Phantom was, we were shocked to find, still bad.  Against an equal points force it was often in its last or next to last tier by the end of the first turn, regardless of which player went first.  It never survived the second turn.  After testing step by step we found the two major issues were 1) it took damage too quickly, and 2) the Macro Weapons didn't do enough damage, even against non-titanic units (why is a Leman Russ able to shrug off a D Bombard?).  Then we found what was really the sweet spot:

 
With the save already at 2+ and the T at 12, I was leaning to giving it a -1 to hit all the time, not just when it charged or assaulted, but at the suggestion of others tried T14, and to my surprise that small tweak seemed to slow things down a bit, keeping the Phantom in the second tier by the end of the first turn.  In addition the tweaked macro weapons (originally tested as "fires twice at the same target") made the primary weapons feel substantially dangerous, even moreso than the other solid weapons. 


Above: My favourite moment from playtesting.

With these changes it sits between the Reaver and Warlord and is pointed accordingly.

For those wanting an updated version the rules they can be found: HERE
Please note: Damage Tiers or on the fluff/image page.

Saturday, December 23, 2017

Ulthwe Written Battle Report Double Header 1.5K/2K

I had a chance to play two times this week, which was good, because when I showed up for my first 2k game I had stupidly left a squad home, so we improvised down to a 1500 game.  My Ulthwe force was taking on Thousand Sons, a force I have taken on once before, but this time they would be without Magnus.

My force (note, because my force was altered at the last minute the Bonesinger was played as a Spiritseer):


His force (note the Rhino is standing in as a Predator for this list as his army is still being built and painted):


Getting to chose the deployment and which zone is mine I opted for Hammer and Anvil.  He deployed towards the front of his deployment zone and I deployed near the back.  With 6 objectives placed we would each choose three and roll to see which one was the objective that mattered a few turns in.  I had paid three CP to place two units of Guardians in reserve.


With deployment decided we rolled off and my opponent was going first.  Before his turn started my Rangers exited the webway:


From there the forces of Tzeentch marched forward, aggressively moving up the field, including teleporting Terminators directly in front of my lines, further back than they'd like to be due to my Rangers and a cheekily deployed Autarch in a small building.


Using Forewarning my Dark Reapers interrupted his turn to slay 4 of the terminators, substantially weakening their firepower.


The forces of Tzeentch had a mild psychic phase being out of range for most of their powers and failing to cast one power intended to buff the terminators.  Their combined firepower managed to slaughter the ranger squad and obliterate one of the Fire Prisms.


My foe had done some solid damage, and shocked me by taking out one of my prisms in a single shooting phase.  I moved some of my support units forward and brought in both squads of Guardians.  Many of my psychic units were beyond the range at which they could be denied, making them that much more threatening to my opponent.


I unleashed a series of Smites and doomed the terminators and guided the prism.  By the time my shooting was done the Terminators were obliterated, the Daemon Prince was at 2 wounds, a Predator had been destroyed, and a squad of Rubrics had been shredded by the rear squad of Guardians.  At this point my opponent conceded.  The destruction was too all consuming for his army to come back, especially since at that point I had total board control.  He didn't have the speed to combat my guardians in his back lines and saw no path to victory.


What I learned in this game is that without Magnus 1k Sons feel like they have a seriously steep hill to climb.  I don't know if they can really be played without him in a dedicated list and still be fun for that player.  It probably feels like he has to play a different game than everyone else.  Likely they would benefit greatly from detachments of Daemons to smooth out some of the rough areas for them and make them feel more balanced and capable.  I learned a lot more about the 1k Sons than I did my own force.

Game 2

The next day I had my full 2k version of the list, so everything is what you see is what you get, including the giant squad of 24 Storm Guardians!  I would be facing the Black Templar again!

My Ulthwe force:


Forces of the Black Templar:


 In this game we had to determine deployment before placing objectives, and two objectives were placed in the neutral zone (worth 2 VP at the end of the game each), and one in each deployment zone (worth 1 to the owning player and 4 to the opponent).

We randomly determined Hammer and Anvil as a set up, and I chose the same side as before on the identical board, with nearly identical setup.  My foe finished first and as before, got the first turn and I failed to Seize.  Apparently he had been Seized on in his last 6 games in a row.  I felt bad for him as that had happened to me around the end of last edition.  I had something like 13 or 14 games in a row where I either lost the first turn roll off and failed to Seize, or was Seized upon, and many of them were Seizes.

Deployment:


My Rangers arrived and took cover near a neutral marker.


My hope here was to weather his fire and snag the two neutral spots.  I hoped I could delay his approach by dropping units at his rear to threaten his Objective and holding up his army from getting to my Objective.  

He moved forward, but relatively conservatively where possible. It was not the brazen launch forward I had anticipated.  His Storm Talon (foolishly not pictured below) had moved to take the neutral objective near my storm guardians.  His firepower had managed to bring one of the Fire Prisms to just 6 wounds and killed 4 Dark Reapers and caused 7 wounds to the Storm Guardians and 2 Rangers.  Morale killed another 5 Guardians(I had rolled a 6 for the Dark Reaper Morale and rerolled to a 2, so I couldn't reroll the Guardian roll) knocking the unit down to half its starting size.  His terminators were still patiently waiting to Deep Strike.


I held my force almost entirely in place, including the units in reserve, except to shuffle the Hemlock to my right flank to take on the Storm Talon and bring some support forward.  The Bonesinger healed the wounded Fireprism 3 Wounds!  I doomed the Storm Talon and crashed it with a combination of psychic attacks, shooting from the Storm Guardians (thanks to Doom they managed to bring it down to 3 wounds), and the Hemlock.  This had relieved me of the worst of his anti infantry firepower that could target me.  then my other units managed to take down the empty Razorback that had been flanking the Land Raider and damage the Vindicator.


The Black Templar didn't move much, with only the Land Raider trundling forward and the Vindicator repositioning.  Otherwise their shooting was precise, but not enough to do the damage they wanted.  They managed to kill another Ranger, bring the other Fire Prism down to 6 wounds, and knock the Hemlock down to just 3 wounds. His Terminators remained in reserve.


I hoped to make a decisive blow against his forces, but had to remain patient.  I pushed the Hemlock at its maximum speed to face the Land Raider while the Guardians and Hawks waited in reserve.  I fired everything I could at the Land Raider, unleashing all of my combined firepower at it... and with it on just 6 wounds I fired the last of my Fire Prisms at it, the last unit that could do the job, and I had 5 Shots.  All hit.  All wounded.  He saved one.  I rolled my four dice and totalled... 5 wounds.  3 1-s and a 2 on my D3.  I burned a CP to reroll one of the 1's... and got another 1.  It sat on 1 wound, crippled, but doing its job.


He brought in his Terminators, out of line of sight to my right Prism and my reapers, but I didn't have any CP left anyway.  He was about to hit my backlines.  The Vindicator blasted the Hemlock out of the sky, burning his last CP to reroll his damage from 2 to 5, enough to knock it out of the sky.  A unit hopped out of the Raider and moved to the centre of the table.  His shooting then killed a couple Storm Guardians and another two rangers, but in assault his marines made it in to combat with the rangers wiping them out.  The Terminators failed their 9" charge to the Prism both times.  He felt concerned, but the centre of the table was his.


Now that his force had committed I pounced.  I moved Eldrad closer to the Terminators and repositioned one of the Prisms to face him.  I then brought in the Hawks and one units of Guardians to flank the rear of his force in a pincer move while the other squad bolstered the front of my army.  I doomed the Terminators and Guided one of the units of Guardians.  Eldrad alone was responsible for killing four Storm Shield terminators thanks to Executioner and Smite, putting a full 9 wounds into the squad.  The shooting phase was decisive as the two units of guardians destroyed a Vindicator, Land Raider and Two squads of tacticals.  The Swooping Hawks had killed one tactical marine with a grenade, and their wealth of shooting caused 5 wounds... and the squad proceeded to fail 3 more saves.  The prisms brought the Predator down to just a couple wounds.  With their forces completely surrounded, and their numbers thinned to just a a single squad and the now exposed leadership of the force the Black Templar conceded, evacuating the field.


What I learned:

My favourite use for Eldrad is as living artillery.  He excels at it, and the more I use him that way the more I want to be ultra aggressive with him.  I've never held onto my reserves that long before, especially with so many units being held, but since I was waiting for him to commit his forces, which I still think was the right play, I was letting him really determine when they came in.  The last thing i wanted was for him to respond to my mostly unarmoured units with a high volume of shooting unit that could chew right through them.  The Bonesinger was okay babysitting the tanks, and was the difference between them being able to fire on the full chart or below it, which was really handy.

My Warlock with Embolden/Horrify was useless.  It never did anything.  I was hoping characters would get close enough for Eldrad to surprise Mind War them after I embolden him and fly the Hemlock near them, but it never worked out, but sometimes that's what happens when you plan out how your army will function to certain threats at the army building stage.  No plan lasts beyond meeting the enemy.